Kilardar Temperature and Humidity Monitoring Device Wifi Identification
Before starting the wireless internet definition of the device, the following materials should be prepared;
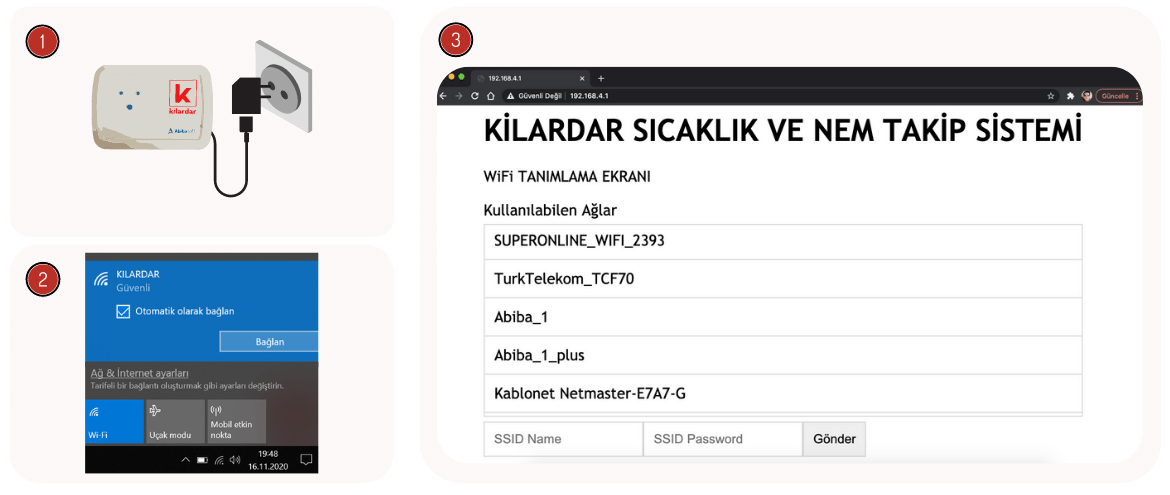
1. Adapter and plug connection of Kilardar temperature and humidity
monitoring device is made. Power the Kilardar device with the USB cable.
2. Connect to the KILARDAR network from the list of wireless
networks on
the laptop (as in the figure) or smartphone. Enter kilardar as the
password.
3. Open a similar page by typing 192.168.4.1 in the address line
of any
internet browser (Chrome or Explorer). Type the WiFi Name and WiFi Password of
the wireless network listed in the blank
boxes on the screen and click the submit button.
After waiting for 20 seconds, if there is no movement on the device LEDs; Unplug the adapter cable and plug it in again. Repeat the instructions from the 2nd item.
Now; Register the device to the system by following the steps in Registration Directory.
Review Kilardar Guides

Technical Specification
Device Guide
Setup Manual
Installation Guide
Connection Setup
WiFi Identification
Membership
Registration Directory
User Manual
Usage GuideReady to started?
Keep the temperature and humidity values in the environment at the desired level with the Kilardar Continuous Improvement System.