Kilardar Temperature and Humidity Monitoring Device Setup Manual
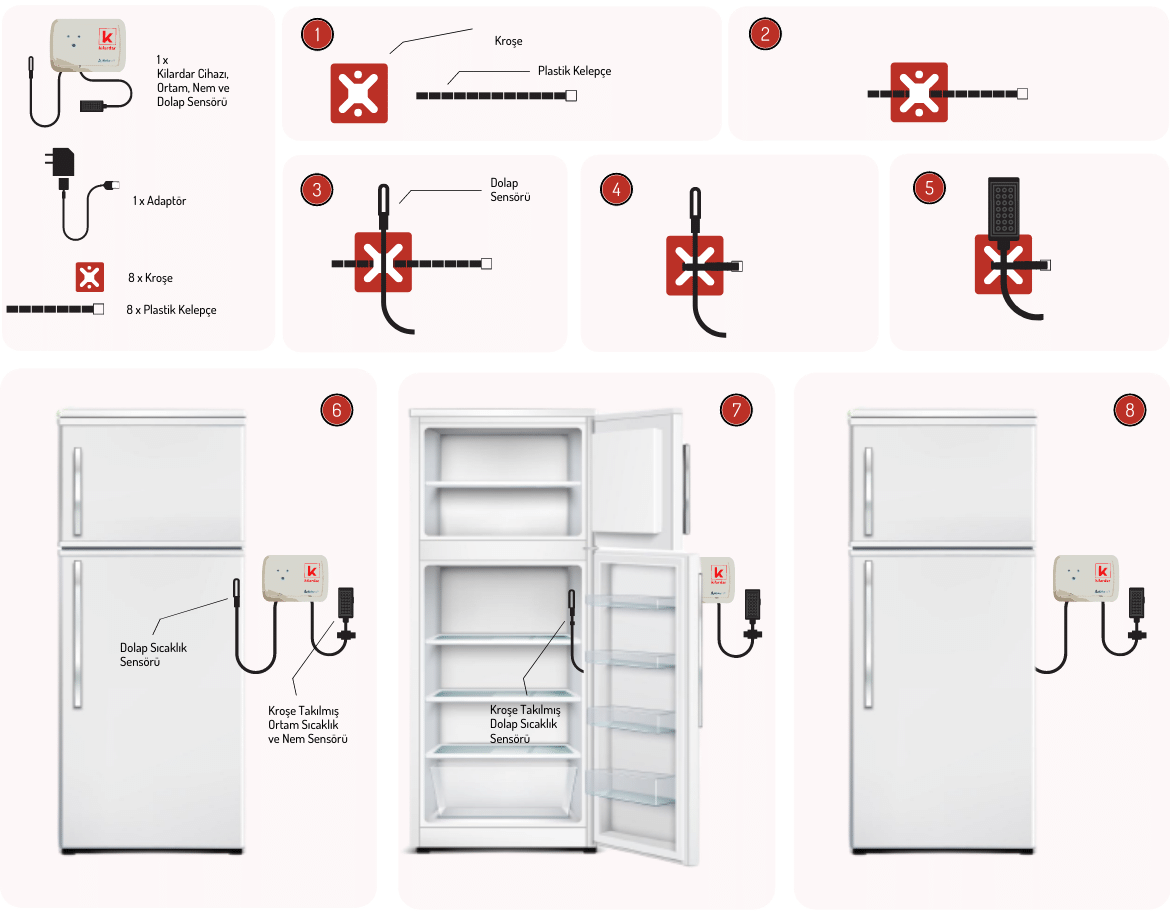
1. Take a crochet and a plastic clamp each.
2. Pass the plastic clamp through the opening of the clamp.
3. Hold the cabinet temperature sensor where the metal part ends
on the crochet.
4. Wrap the plastic clamp around the temperature sensor. Tighten
through the
hole on the other side of the clamp.
5. Wrap the plastic clamp around the ambient temperature and humidity
sensor.
Tighten through the hole on the other side of the clamp.
6. Hang the nailed hanging bracket behind the Kilardar temperature and
humidity
monitoring device by fixing the counterpart to be mounted on the wall
with a
screw. When it needs to be removed, pull it out by pulling firmly upwards.
7. Take the cupboard sensor fixed with the plastic clamp and the crochet
through
the door of the refrigerator.
8. Fix the ambient temperature and humidity sensor in a middle
place not close
to steam sources such as air conditioners and kettle.
Now; Configure the WiFi settings of the device by following the steps in WiFi Identification.
Review Kilardar Guides

Technical Specification
Device Guide
Setup Manual
Installation Guide
Connection Setup
WiFi Identification
Membership
Registration Directory
User Manual
Usage GuideReady to started?
Keep the temperature and humidity values in the environment at the desired level with the Kilardar Continuous Improvement System.